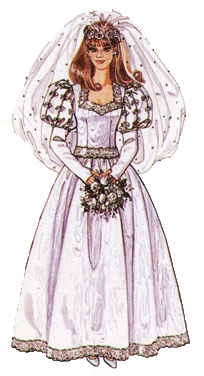
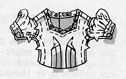
Barbie’s getting married! You can make the bride to be this lovely wedding dress complete with veil and gloves. For the fabric, lace, and elastic requirements see the back of McCall’s 662 on the Pattern Envelope page.
The pattern will require three pages to print:
Instructions for saving and printing jpg or pdf files are here.
Pdf file of Barbie’s Wedding Dress, Veil, and Gloves
Instructions for Sewing Barbie’s Wedding Dress, Veil, and Gloves
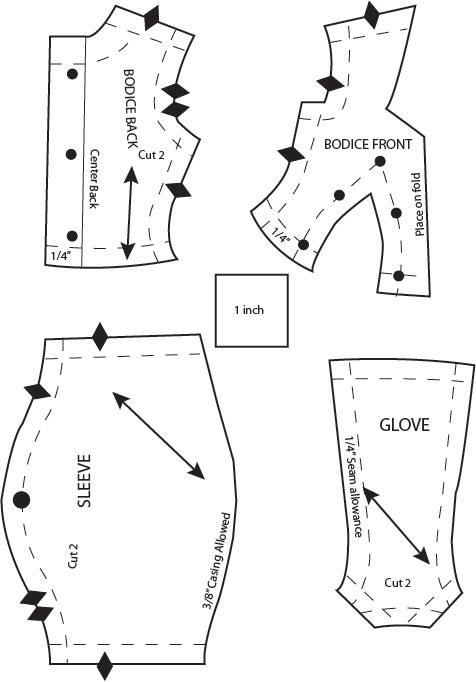
WEDDING DRESS
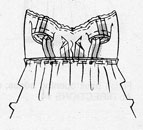
1. To make dart, fold BODICE FRONT, RIGHT SIDES TOGETHER, matching dotted lines and circles. Stitch along dotted lines. Press open and point toward center. Stitch front to BODICE BACK at shoulders:
2. With RIGHT SIDES UP, pin lace to bodice, having scalloped edge even with raw neck edge, folding in corners on straight edge. Stitch close to straight edge of lace:

3. To gather cap of SLEEVE, machine baste 1/4″ and 1/8″ from raw edge. For casing, turn 3/8″ to INSIDE on lower edge of sleeve. Stitch 1/4″ from fold edge:
4. Insert a 1-1/4″ length of elastic through casing, having ends even. Stitch across ends:
5. Pin sleeve to armhole, RIGHT SIDES TOGETHER, matching notches and circle to shoulder seam. Pull up bobbin threads and adjust gathers to fit. Hand-baste. Stitch. Turn seam allowances toward sleeve:
6. Stitch underarm seam, matching cross seams and notches:
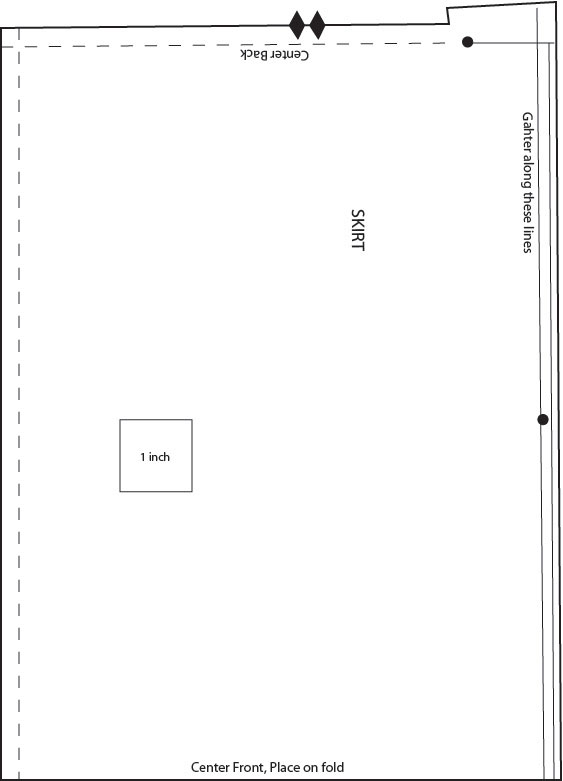
7. Finish lower edge of SKIRT by turning under 1/4″ and pressing (or basting). With RIGHT SIDES up, pin straight edge of lace just over finished edge of skirt. Stitch close to straight edge of lace. To gather upper edge of skirt, machine baste 1/4″ and 1/8″ from raw edge:
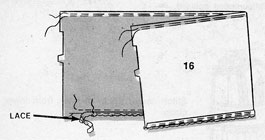
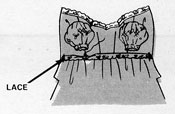
8. Pin skirt to bodice, RIGHT SIDES TOGETHER, matching center fronts, circle to side seam having back edges even. Pull up bobbin threads and adjust gathers. Hand-baste. Stitch. Press seam allowance upward:
9. Cut lace long enough for waist. Center over seam. Tack to side seams and baste across ends:
10. Stitch center seam of back from lower edge to circle:
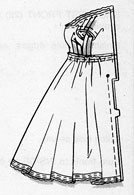
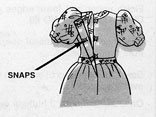
11. Finish back opening edges with snaps:
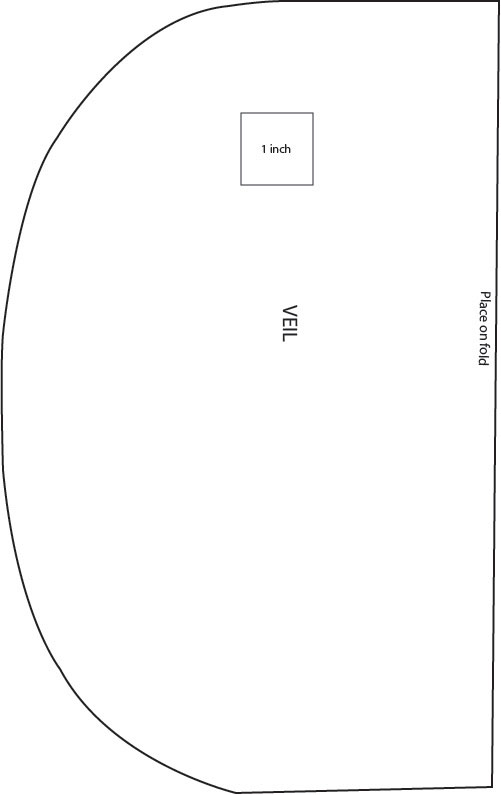
VEIL
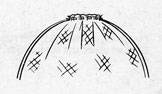
12. Fold VEIL in half. To gather veil, machine bast 1/4″ and 1/8″ from fold edge:
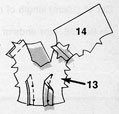
13. Pull up bobbin threads to approximately 1-1/2″. Tie thread ends:
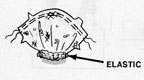
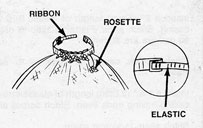
14. Cut 4″ of ribbon and center over gathers. Sew rosette to ribbon through all thicknesses.
Cut a 1-1/4″ length of elastic. Stitch elastic to ends of ribbon, turning under ends of ribbon:
GLOVES
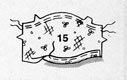
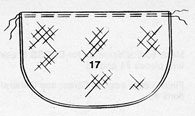
15. Stitch 1/4″ from upper and lower edge of GLOVE:

16. Press under on lines of stitching. Stitch close to fold. Cut raw edge close to stitching:

17. Stitch seam in glove:

18. Turn RIGHT SIDE OUT:

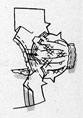
19. Tack points at lower edges together as illustrated:
