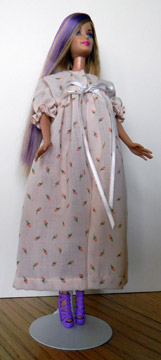
A peignoir is a light dressing gown or negligee. It is a long outer garment, frequently made of sheer chiffon or similar fabric. I made the peignoir on the right of lightweight cotton print. It is somewhat see-through.
The pattern is titled “A Trousseau Wardrobe” which is wardrobe for everything related to getting engaged, getting married, and going on the honeymoon.
The peignoir is just a light bathrobe!
Another change that I can see is that I used 1/8″ ribbon at the front closing instead of the 1/4″ that the pattern calls for. My Barbie needs slippers!
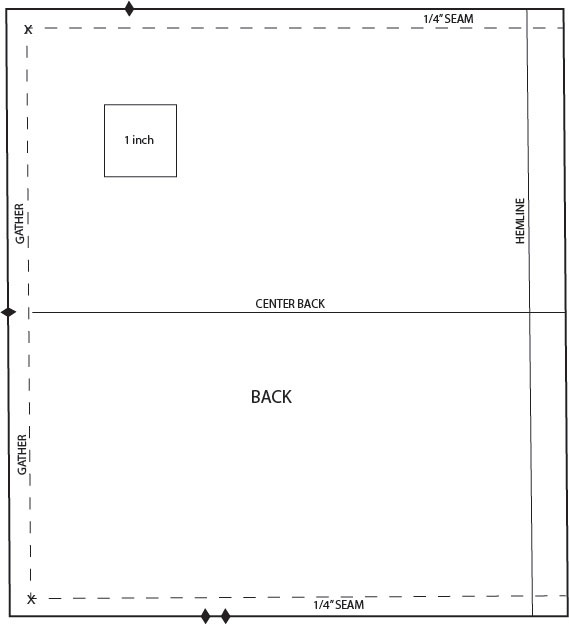
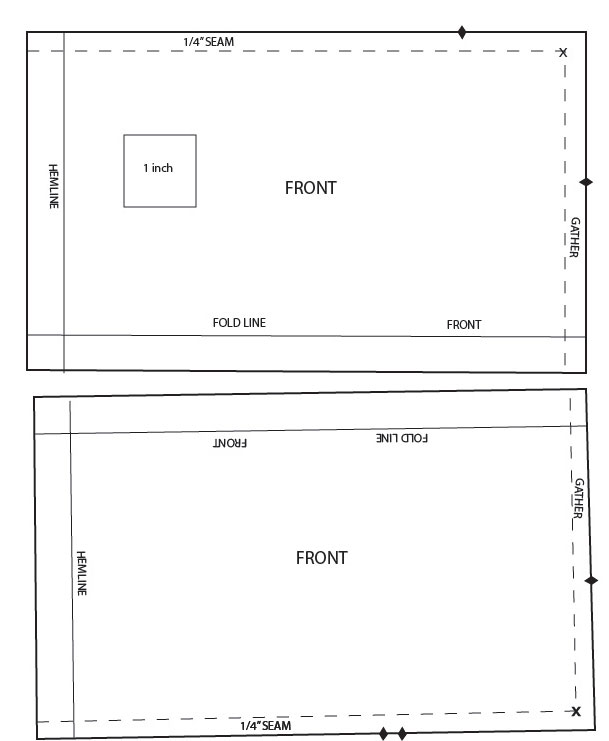
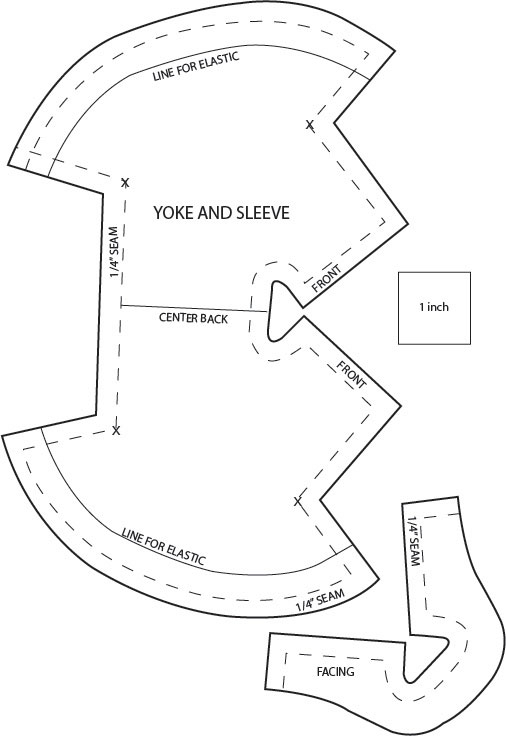
The pattern prints on 3 pages:
Instructions for saving and printing jpg or pdf files are here.
Pdf file of Barbies Peignoir
Instructions for Sewing Barbie’s Peignoir
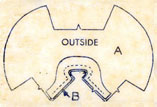
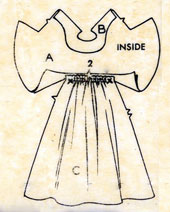
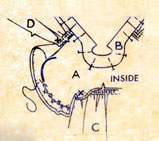
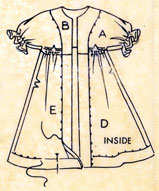
1. With right sides together and matching notch pin facing to yoke, starting at one lower front edge, continuing around the neckline and back to the other lower front edge, with all your pins pointing in one direction. Stitch:
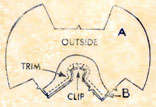
2. Trim the corners ant the neck edge so they can be turned to sharp points. Make small clips at the neckline just to, but not through, the seam:
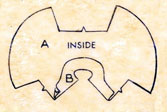
3. Turn and press the facing right side out, making a neat curve and sharp points:
BACK
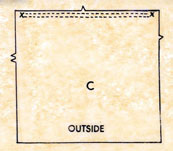
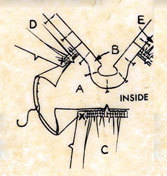
4. Make two rows of gathers across the top edge, from dot to dot. Leave long threads at either end of your gathering stitches:
5. With right sides together, match and pin back piece to yoke matching notches and dots. Secure one end of gathering threads and pull the free ends until the back is gathered enough. Then tack the loose threads so they don’t slip. Stitch from the gathered side between the dots, slowly, and adjusting the gathers as you go:
FRONT
6. Make two rows of gathers across the top edge of both front pieces, from the dots to the front fold line:
7. Open out lower edges of facing and with right sides together pin the front pieces to the yoke matching notches and dots. The front facing edges must be even with the front edge of front skirt pieces.
Gather as with the back piece, matching notches. Pin and stitch the same way:
8. Press your pieces: press gathered seams up, toward the yoke. Press the front folds under pressing the front facing to inside. Pin the facing in place:
SLEEVES
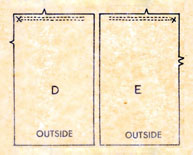
9. Make a rolled hem at the bottom of the sleeve. Roll the cut edge under once, then once again so that all your raw threads are tucked under. Stitch the rolled hem in place with blind-stitching making the stitches small and loose enough to hold but not pucker:
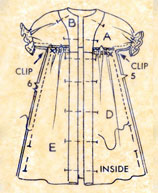
10. Elastic makes the “puff” in the sleeve which is held in place with cross-stitching. Use tailors chalk or light pencil to mark the elastic line from the pattern. Use this line as the guide for the elastic. Cut a 2-inch length of rolled elastic for each sleeve. Tack the ends firmly to the sleeve edge at each end of the guide line:
11. With needle and double thread, take a small cross stitch on one side of the guide line, another cross stitch on the other side, with the elastic between. The stitches must not catch the elastic. Instead, they will form a “casing”. Follow the sketch below.
Keep pushing the fabric back as you stitch to make it easier to follow the guide line and hold the elastic in place. Make your cross stitches from seam edge to seam edge, tacking each end in place:
SIDE SEAMS
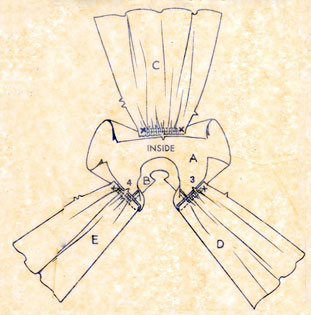
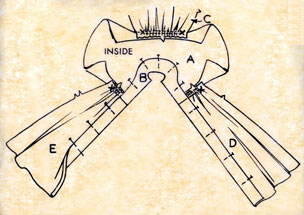
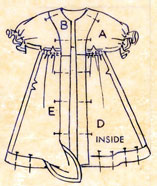
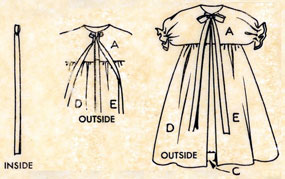
12. Make small diagonal clips to, not through, the dots at each end of the yoke. With right sides together, pin the seam together from sleeve edge to hem. Stitch in the same direction pulling out the pins as you go. Do this for both side seams:
13. Press side and sleeve seams open. Press the fold into the hem opening the facing edges first as shown. Pin the hem into place:
14. Blind-stitch the hem in place. Fold the facings back over the hem edge and blind stitch the facings in place starting at one lower edge and continuing around the neckline and down the other side to the lower edge:
15. For the ribbon ties at the front edge, cut two 9″ pieces of 1/4″ ribbon. Make a small loop at one end and tack it to the top front. Repeat for the other side. To close, tie the ribbon in a bow. Do a final press:


