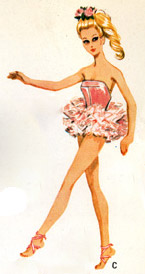
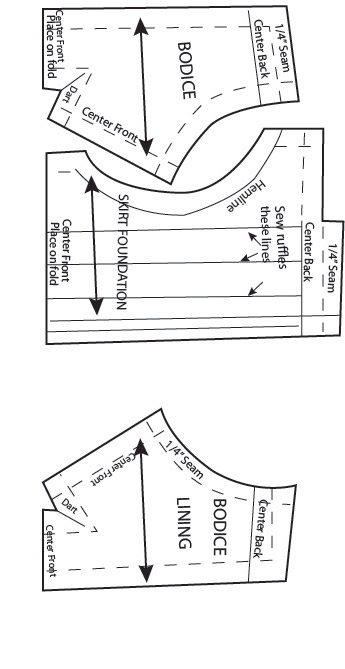
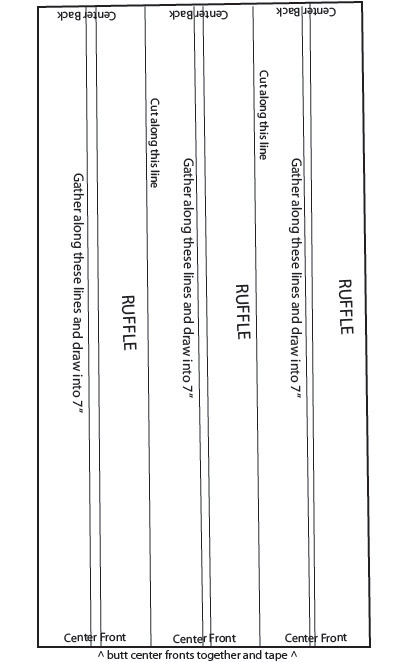
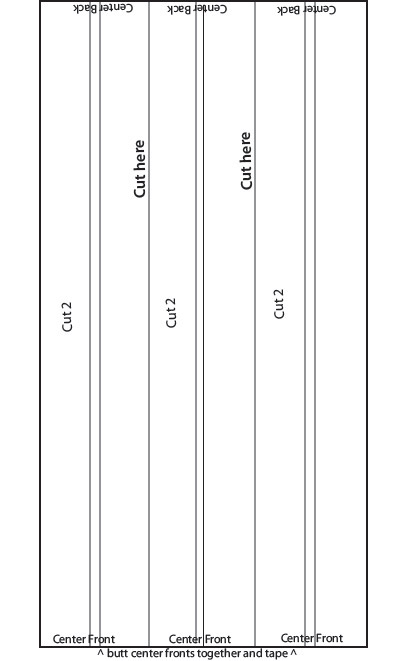
I have a second ballerina out fit for Barbie. It is made differently than Barbie’s Ballerina Outfit that I previously posted. This new ballerina outfit has rows of gathered tulle sewed to the pant instead of a skirt like affair in the first pattern. A ballerina will need both of these outfits!
The pattern will take three pages to print:
Instructions for saving and printing jpg or pdf files are here.
Pdf file of Barbie’s Ballerina Outfit 2
Instructions for Sewing Barbie’s Ballerina Outfit
*This ballerina outfit is made in one piece.
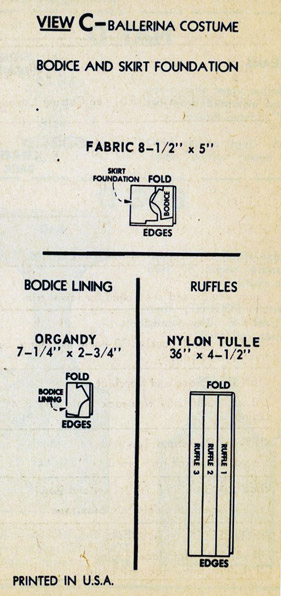
Layout for Ballerina Outfit 2:
BODICE
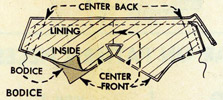
1. Line bodice, RIGHT SIDES TOGETHER; stitch un-notched upper and back edges. Trim seams, clipping away corners:
2. Turn bodice right side out, baste together along raw edges and dart lines. Join center front seam, stitching though all thicknesses; press seam open. Make DART, folding on solid line and stitching together along dotted lines. Trim to 1/8″ from stitching:
SKIRT FOUNDATION
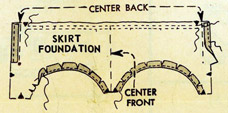
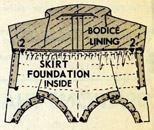
3. Turn in lower edges on HEMLINES, clipping along curves; edge-stitch. Turn under seam alloance on back extension edges above circle, edge-stitch. Run gathering threads along lines indicated at upper edge; DO NOT DRAW UP:
RUFFLES
4. Gather 2 layers together along lines indicated for 3 double ruffles. Draw up gatghers to 7″; fasten threads:
JOINING RUFFLES TO SKIRT FOUNDATION
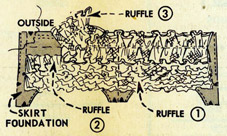
5. Starting with lowest ruffle, stitch each one to position between gathering lines, matching centers and adjusting gathers evenly. Turn each joined ruffle downward to keep it free of next one being joined. Trim away lower edge of bottom ruffle to 3/8″ from gathering:
WAISTLINE SEAM
6. Join Bodice to Skirt Foundation, RIGHT SIDES TOGETHER, matching centers and drawing up gathers to fit evenly. Press seam toward bodice:
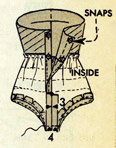
7. Join center back seam to circle. Clip left seam edge to circle. Press seam open. Join crotch seam, matching centers:
FINISHING
Turn under right back opening edge on center line, press. Lap backs, matching centers; fasten with 2 snaps. Fasten two small roses to hair as illustrated on envelope if desired.

