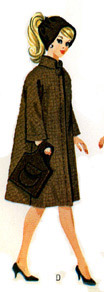
I have wanted to make this coat and purse for Barbie for a long time. The hat I am not so sure about but the pattern is here in case you want to try it. I am going to make my coat of lightweight wool just to keep the bulk down in the seam allowances. It could also be made of soft denim or anything that would drape softly.
The purse (and hat) should be made of something that doesn’t fray such as felt, leather, faux leather, or pleather. Something like that.
![]()
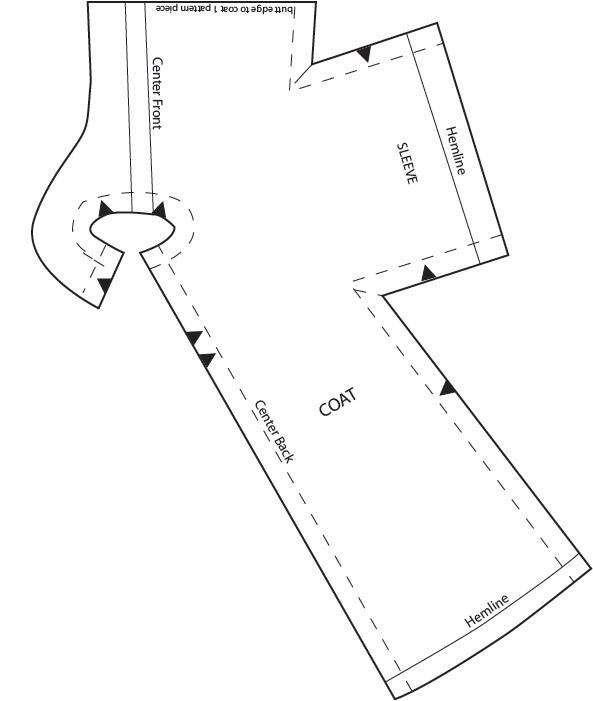
There are three pages to this pattern. You must cut the edge of one of the coat pieces, butt it up to the second piece and tape it as the pattern would not fit on one page.

Instructions for saving and printing jpg or pdf files are here.
Pdf file of Barbie’s Coat, Hat, and Purse
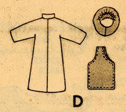
Instructions for Sewing Barbie’s Coat, Hat, and Purse
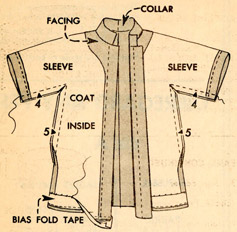
COAT
1. Sew center back seams with right sides together. Then join seams for facing extensions; press seams open.
SLEEVE HEMS Turn hems to inside on lines indicated, stitch 1/4″ from turned edges:
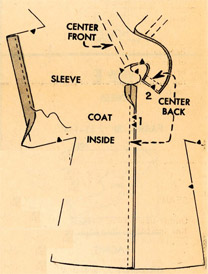
2. COLLAR Fold right sides together on line indicated; stitch ends. Trim seams, turn to right side out and press:
3. JOIN COLLAR TO NECK EDGE Clip neck edge of coat and facing section a full 1/8″ along inner curves. Baste collar to neck edge of coat on OUTSIDE, matching notches and center backs.
Turn facing sections to outside on lines indicated. Pin to neck edge (over collar) matching center back seams. Stitch neck edge; trim seam:
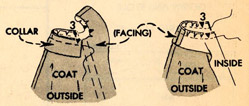
4. Turn facings to inside and press. Top-stitch coat 3/8″ from front edges.
UNDERARM SEAMS Join underarm seams. Clip seams at inner corners as indicated; press seams open.
LOWER HEM Stitch one edge of single fold bias tape a full 1/8″ over lower edge of coat, turning in front ends. Turn hem on hemline and press; slip-stitch free edge of tape flat to coat:
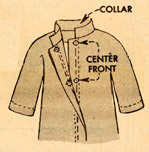
5. FINISHING Lap fronts, matching centers; fasten with snap at neck and about 1-1/2″ below. Sew buttons over top snap on right side of coat:
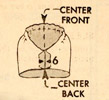
HAT
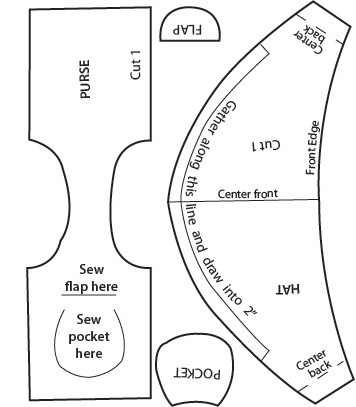
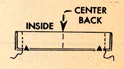
6. Gather upper edge along line indicated; draw into 2″ and fasten thread. Join center back seam; press open:
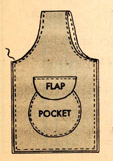
PURSE
7. Edge-stitch curved handle edges of bag. Stitch POCKET, then FLAP to purse along lines indicated:

8. Fold purse, WRONG SIDES TOGETHER , edges even; stitch sides and bottom close to edges: